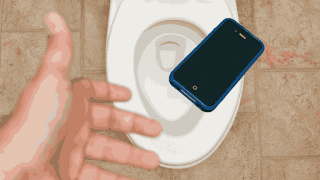
So if you don't have any waterproof phones and want to fix your water damaged phone then follow these steps below:
Step 1: Take it out of the water as soon as possible! I know it's really hard to react quickly when such a devastating event takes place, but you must do it ASAP! Once the phone is out of the water make sure it's off and stays off that way. Even if you see your phone is okay it's very important to shut it down or just pull out the battery. Then put it in a safe place like flat surface over some paper towels or anything that will soak the water.
Step 2: Don't do this following things!
- Don't turn on the phone. As I already mentioned, Electrical components don't play well with water...
- Don't plug it in on Charger or USB either for the same reason.
- Don't press any keys. This can push water further into the phone.
- Don't shake or blow into the device! This could also push water into deeper areas of your device.
- Don't apply any heat to the device! Remember excessive heat can also damage your phone.
- Don't move the device around too much. Same deal, you don't want the water moving around inside the phone.

Step 3: Disassemble the device! Please don't mistake this step with "Take the whole phone apart!" What I mean is you should remove everything that is removable by normal user like battery, sims, memory cards etc. Now if you're a tech specialist of sorts and know very well the ins and outs of phone and don't mind risking voiding the device's warranty, then you can go further and take the whole phone apart too. It might help with drying up every single piece more faster.
Step 4: Try to dry the exterior part with a paper towel. You first try dry every single drop of water which is found in the exterior of your phone. Gently dry everything out without moving things around too much.
Step 4: You could try a Vacuum Cleaner! Of course there're areas which the paper towel can't access. And while I told you not to blow anything into of your phone, I didn't tell you not to suction the water out! In fact, a vacuum cleaner can suck off bits of water from the with too much risk.
Step 5: Time to dry it out! It's the hardest part, because it involves leaving the device untouched for an extended period of time. This means you can't use your smartphone :o If you've another phone you can borrow just make sure the sim card is completely dried out and insert it into the working handset.
So how do you dry your device out? You could just leave the phone on top of a counter or inside a drawer. But here's an idea , the idea is to put it in an environment that'll ease it's drying process. A very common practice is to put your device in a Ziploc Bag full of rice and let it rest there for about 2 or 3 days.
Step 6: The moment of truth! So you did everything you could do and a few days have passed by. It's time to see if your all efforts paid off. Take the phone out of wherever you left it and put it all together. Then plug the phone in and try to turn it on. If it works, you have succeeded!!! Now test all the components such as Camera, Touch screen, Speakers and all the ports. Make a call to see if the microphone still working or not.
Now if it's not working, then it's time to accept the defeat and take it to a professional :(
Please comment below if you've any other ideas and if you've questions to ask :)
- This can help you in future.
- For JIO Sim users.
- If you're a music lover then check this and this.
- To play big games on low memory check this


No comments:
Post a Comment